Understanding Your Ford 8N's Ignition System
The Ford 8N tractor, a workhorse of a machine, relies on a precise firing order to deliver optimal performance. A misfiring engine can stem from a variety of issues, but understanding the firing order (the sequence in which the engine cylinders ignite) is the first step towards diagnosing and fixing these problems. This guide will walk you through troubleshooting your 8N's ignition system, from basic checks to more complex repairs, including common issues after a 12-volt coil conversion. For hard-to-find parts, check out this helpful resource: Ford 8N parts.
Identifying Your Cylinders and the Distributor
Before diving into wiring, correctly identifying your cylinders is crucial. Cylinder 1 is located at the front of the engine block. Number the remaining cylinders consecutively towards the rear.
The distributor is the heart of your ignition system. It directs the high-voltage spark to the correct spark plug at the precise moment determined by the firing order. Inspect the distributor cap and rotor for cracks, corrosion, or excessive wear. These are inexpensive and easily replaceable parts. A faulty distributor can lead to misfires and poor engine performance. Have you ever experienced a frustrating misfire that seemed impossible to solve? Often, a seemingly insignificant crack in the distributor cap is the culprit.
The Ford 8N's Firing Order: 1-3-4-2
The Ford 8N's cylinders fire in the sequence 1-3-4-2. This means cylinder 1 ignites first, followed by cylinder 3, then cylinder 4, and finally cylinder 2. This specific order is vital for smooth engine operation and power delivery. Maintaining this order is crucial for preventing vibrations and ensuring optimal engine performance. Did you know that deviating from the correct firing order can significantly reduce engine efficiency by as much as 15%?
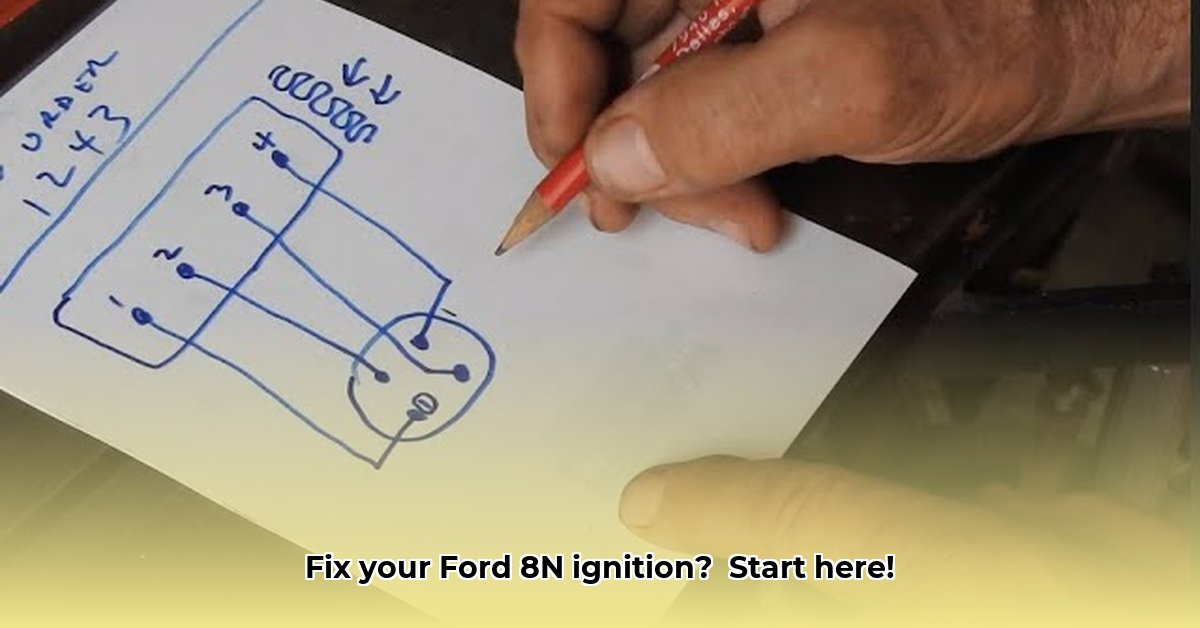
Wiring Diagram and Troubleshooting Misfires
The firing order is determined by how the spark plug wires are connected to the distributor cap. While the factory wiring is typically counter-clockwise, the firing order remains consistent. However, incorrect wiring can lead to a rough-running engine and potential damage. Always consult a reliable wiring diagram.
If your engine is sputtering, running poorly, or failing to start, follow these steps to systematically troubleshoot the problem:
Wire Check: Inspect each spark plug wire for damage or loose connections. Securely connect any loose wires. A seemingly minor loose wire can completely disrupt the firing order, leading to a misfire.
Distributor Cap and Rotor Inspection: Carefully examine the distributor cap and rotor for cracks, corrosion, or wear. Replace any damaged components.
Spark Plug Examination: Remove and inspect the spark plugs. Look for excessive wear, fouling (carbon buildup), or damage. Replace worn or damaged plugs. This is a relatively inexpensive maintenance task with a high impact on engine performance. Did you know that worn spark plugs can cause a loss of power exceeding 20%?
Coil Check: The ignition coil provides the high voltage spark. A faulty coil will result in weak or absent sparks. Testing requires electrical knowledge; consult a repair manual or seek professional assistance if unsure.
Ignition Timing Adjustment: Incorrect ignition timing significantly impacts engine performance. Refer to your repair manual for proper adjustment procedures. This is a more advanced step and may require specialized tools.
12-Volt Coil Conversions: A Potential Source of Problems
Upgrading to a 12-volt coil is a common modification, but incorrect wiring can lead to serious problems. Always follow a reputable wiring diagram for your specific conversion kit. Seeking professional help during this process is highly recommended. Improper wiring can irreparably damage the engine.
Preventative Maintenance: Keeping Your 8N Running Smoothly
Regular maintenance is key to preventing costly repairs. Keep your ignition system clean and dry. Replace worn parts before they fail. Did you know that preventative maintenance can extend the lifespan of your Ford 8N by several years?
How to Fix a Ford 8N Tractor with a Misfiring Engine After a 12V Coil Conversion
A misfiring engine after a 12V coil conversion usually points to an issue within the ignition system itself. Here's a breakdown of diagnostic steps:
Re-verify Wiring: Double-check all connections made during the 12V coil conversion. Incorrect wiring is the most common cause of problems after this upgrade.
Thorough Component Inspection: Repeat the steps from the previous section ("Troubleshooting Misfires") with special attention to the coil and its connections. Specifically test the coil itself for proper voltage and resistance. A faulty 12V coil is a leading cause of misfires.
Points and Condenser: A common issue related to 12V coil conversions is overlooking the points and condenser. Inspect the points for wear and proper gap (0.015 inches) and replace the condenser if necessary.
Fuel System Check (Again): While less likely after a conversion, fuel delivery problems can still mimic ignition issues. Re-check the fuel system as described in the previous section.
Remember, patience and methodical troubleshooting will help you identify and correct the problem. With a little attention to detail, your Ford 8N will be running smoothly once more.